Measurement for Monotonic Equibiaxial Flexural Strength of Glass
Introduction
In recent years, there has been an increase in smart phones, tablets and other mobile devices that use glass. Mobile products require the strength to resist bends, drops and other external forces, and any glass pieces must also be sufficiently strong. For glass, there are typically two types of strength, which are measured by different methods. One type is edge strength, which is obtained from 3-point (or 4-point) bending tests. When glass is cut, microscopic damage (microcracks) appears at the cut surface. With a 3-point (or 4-point) bending test, strength is determined by the fracture from these cracks. In other words, edge strength could be called an indicator of the degree of damage at a fracture surface. The other type is surface strength, which is determined from ring bending tests. In this method, fracture starts near the center of the glass, so there is no cut surface impact. In other words, surface strength could be called an indicator of the strength of the glass surface itself. In this article, we introduce an example of a ring bending test, as per the ASTM standard, to obtain the surface strength of glass.
Measurements and Jigs

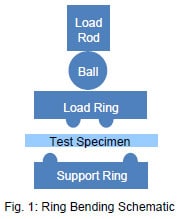
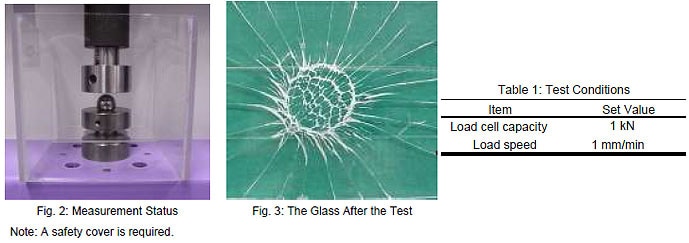
Fig. 1 shows a schematic diagram of the jigs used with the ASTM standard (ASTM C1499-01). This standard includes precise specifications regarding the measurements and jigs, a portion of which are shown below.
- The radius of the ring tip is set to between 0.5 and 1.5 times the thickness of the test specimen
- The ratio of the diameters of the load ring and the support ring is between 0.2 and 0.5
- Setting the diameter ratio to 0.2 is recommended for high-strength objects
(σ > 1 GPa) with a low elastic modulus(E < 100 GPa). - Align the load ring and support ring axes using a 90° V block.
- To observe how the glass cracks develop, affix tape to the load ring prior to measurement.
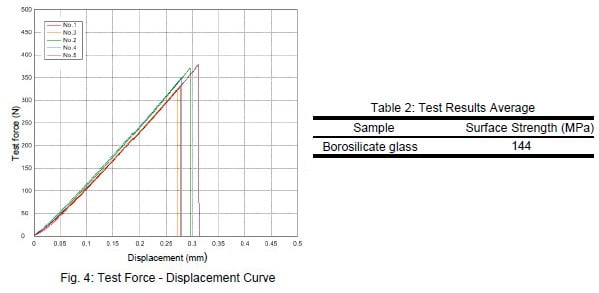
- The surface strength evaluated by the glass ring bending test is automatically calculated by a
numerical formula preregistered with the software's configurable formula function.
Measurement Results


Glass Ring Bending Measurement System
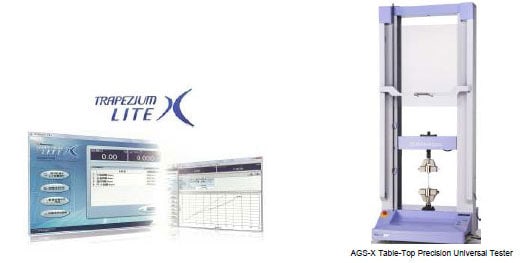
| Tester: AGS-X | Load Cell: 1 kN |
| Test Jig: | Ring bending test jigs, safety cover |
| Software: | TRAPEZIUM LITE X |
- A high-precision load cell is adopted. (The high-precision type is class 0.5; the standard-precision type is class 1.)
Accuracy is guaranteed over a wide range, from 1/500 to 1/1 of the load cell capacity. This supports highly reliable test evaluations. - Crosshead speed range
Tests can be performed over a wide range from 0.001 mm/min to 1,000 mm/min. - High-speed sampling
High-speed sampling, as fast as 1 msec - TRAPEZIUMX LITE X operational software
This is simple, highly effective software. - Jog controller (optional)
This allows hand-held control of the crosshead position. Fine position adjustment is possible using the jog dial. - Optional Test Devices
A variety of tests can be conducted by switching between an abundance of jigs in the lineup


